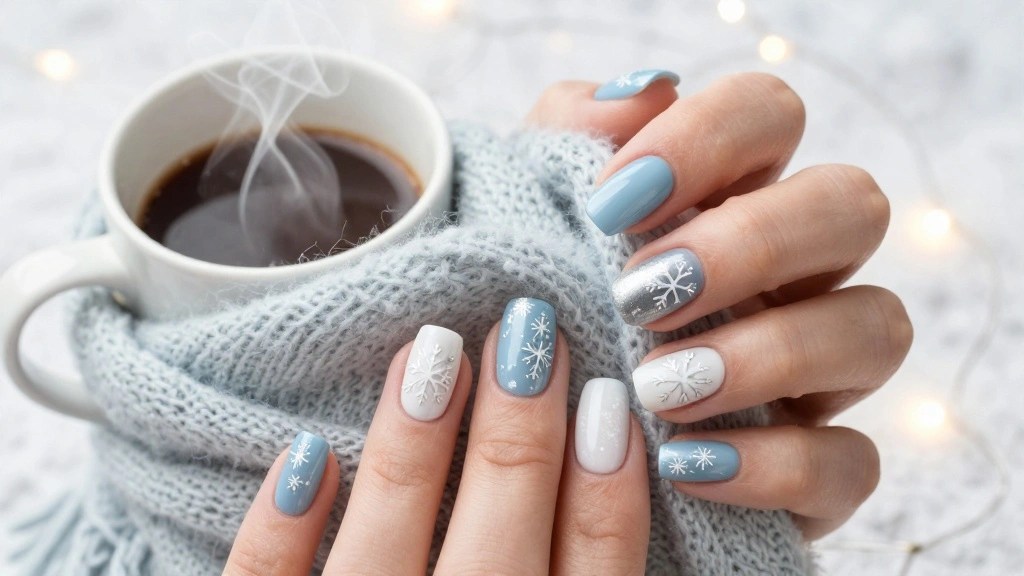
Winter is a magical time of year, bringing cozy evenings and festive cheer. It’s also the perfect season to show off your style with stunning DIY winter nails. If you’re like me, you’ve likely found yourself scrolling through nail art ideas, craving beautiful designs that celebrate the spirit of winter. That’s why I created this post—to help you elevate your nail game with impressive designs you can do yourself.
If you love getting creative and enjoy the satisfaction of a personal touch, this guide is for you. Whether you’re planning a holiday party or just want to feel festive at home, you’ll find tips that inspire you. I’ve gathered ten fabulous DIY winter nail designs that are easy to make and sure to turn heads. From frosty blues to cozy sweater patterns, you’ll discover ideas that are fun, stylish, and perfect for the season.
By following this step-by-step guide, you’ll learn how to create stunning winter nails that impress. You’ll not only save money by doing it yourself, but you’ll also enjoy the creative process. Let’s dive into the world of DIY winter nails and get those creative juices flowing!
Key Takeaways
– Variety of Designs: Explore ten unique winter nail designs, including frosty blues and cute penguins, to match your personal style.
– Step-by-Step Instructions: Each design comes with simple, clear steps to help you execute your nail art easily.
– Materials List: Get a handy list of materials needed for each design to prepare and organize your DIY nail art session.
– Creativity Boost: Channel your creativity and personalize your nails with colors and styles that express your individuality.
– Budget-Friendly Fun: Enjoy salon-quality results at home without spending a fortune, making your winter season even more enjoyable.
Contents
- 1. Frosty Blue Ombre
- 2. Snowflake Accents
- 3. Glittery Icicles
- 4. Cozy Sweater Patterns
- 5. Metallic Winter Wonderland
- 6. Festive Red and Green
- 7. Elegant Marble Effect
- 8. Icy Gradient with Rhinestones
- 9. Cute Penguin Nail Art
- 10. Winter Galaxy Nails
1. Frosty Blue Ombre

If you want to capture the essence of winter, frosty blue ombre nails are a beautiful choice. This design features a stunning blend of two shades of blue, perfectly evoking chilly winter vibes. You’ll love how easy it is to achieve this look with just a few simple materials and techniques. Plus, the sparkle topcoat adds a magical touch, reminiscent of freshly fallen snow.
Begin by applying a protective base coat to keep your nails healthy. Choose a darker blue for the tips and a lighter shade for the cuticles, blending them together using a makeup sponge for a seamless transition. You can even add tiny snowflakes for an extra wintery flair!
Key steps to create this stunning design:
– Apply a protective base coat
– Gradually blend darker blue to lighter blue
– Use a makeup sponge for smooth transitions
– Finish with a sparkling topcoat
– Add snowflakes for a fun twist
This beautiful design not only looks chic but also captures the spirit of winter. You’ll be amazed at how quickly you can achieve this eye-catching look.
Frosty Blue Ombre
Editor’s Choice


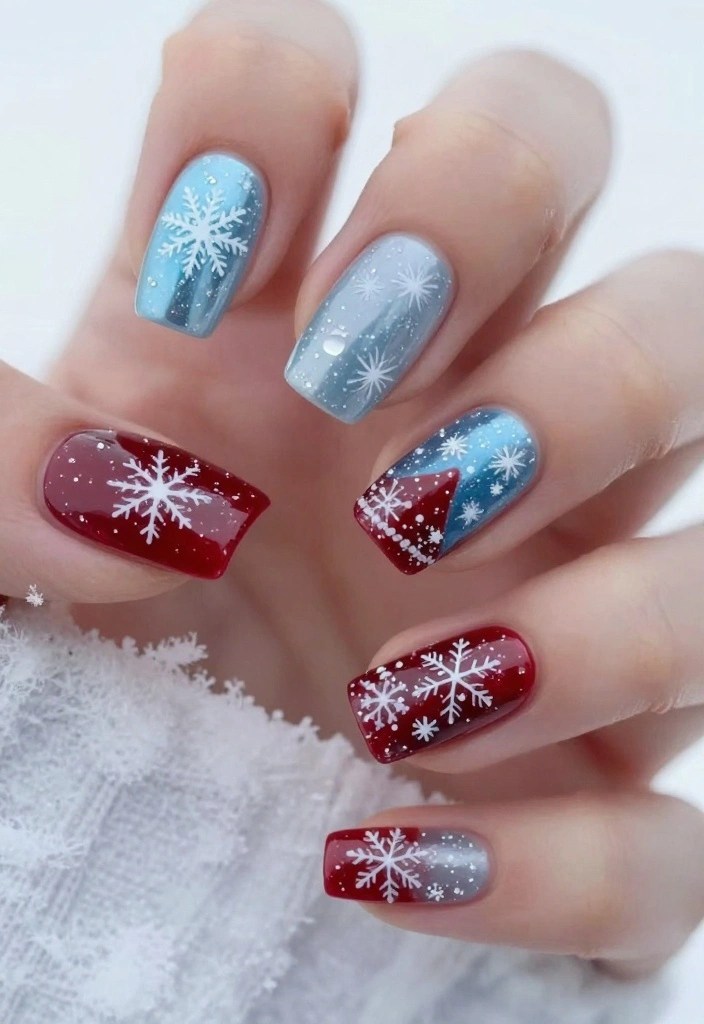
2. Snowflake Accents
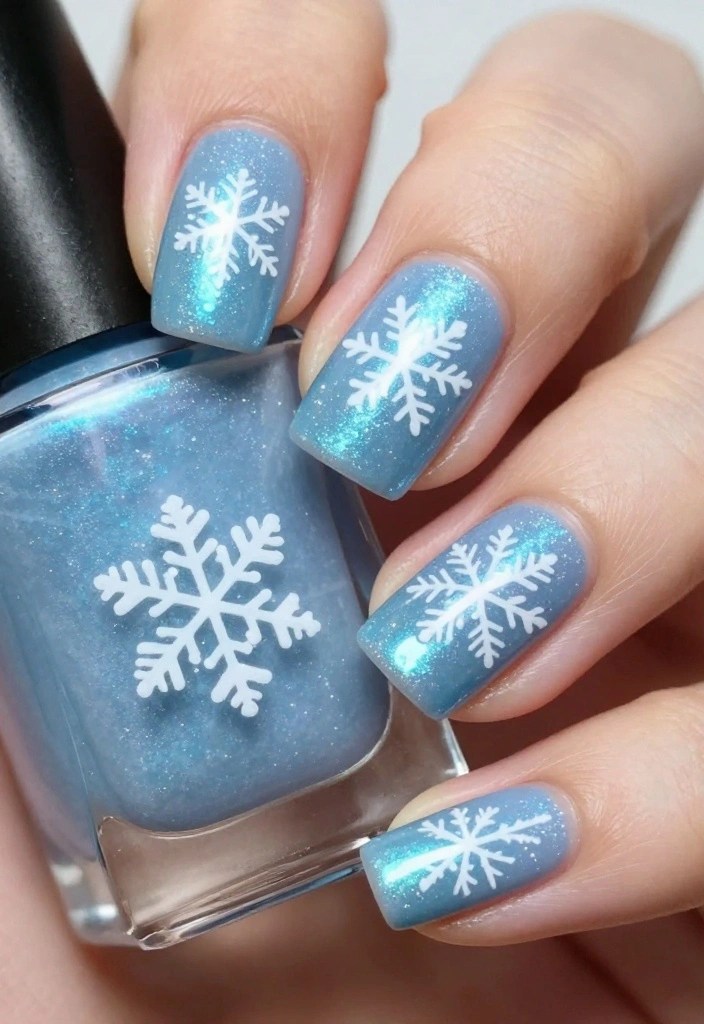
Snowflakes bring a magical touch to your winter nail art! They symbolize winter’s beauty and can be easily incorporated for an elegant look. Using simple techniques, you can create stunning designs that will impress everyone. Choose white or soft blue as your base for a fresh and frosty feel.
After your base coat dries, use a fine brush or dotting tool to draw delicate snowflake designs. Feel free to make just a couple of accent nails or cover all ten for a winter wonderland effect! Don’t worry about perfection; each snowflake is unique and charming in its own way.
To get started, keep these tips in mind:
– Select a white or soft blue base
– Use a thin brush for detailed snowflakes
– Add fine glitter for extra sparkle
– Seal with a topcoat for lasting beauty
This design not only looks festive but also allows you to express your creativity this winter season.
Snowflake Accents
Editor’s Choice


3. Glittery Icicles
Bring the enchanting look of icicles to your nails with a glittery design! This style captures the frosty beauty of winter and adds a dramatic effect that’s sure to turn heads. You can achieve this look easily using some sparkling materials. Start with an icy silver or shimmery white base for that fresh winter feel.
Once the base is dry, apply glittering polish near the tips, letting it drip down for an icicle effect. A toothpick can help create sharp edges for a more realistic appearance. Don’t forget to seal everything with a topcoat to keep your design intact!
Steps to create your glittery icicle nails:
– Start with a base coat and let it dry
– Apply icy silver or white polish as a base
– Brush glitter polish at the tips, dragging downwards
– Add fine glitter or beads for depth
– Finish with a protective topcoat
This look is not only stunning but also allows you to bring a little winter magic to your fingertips.
4. Cozy Sweater Patterns
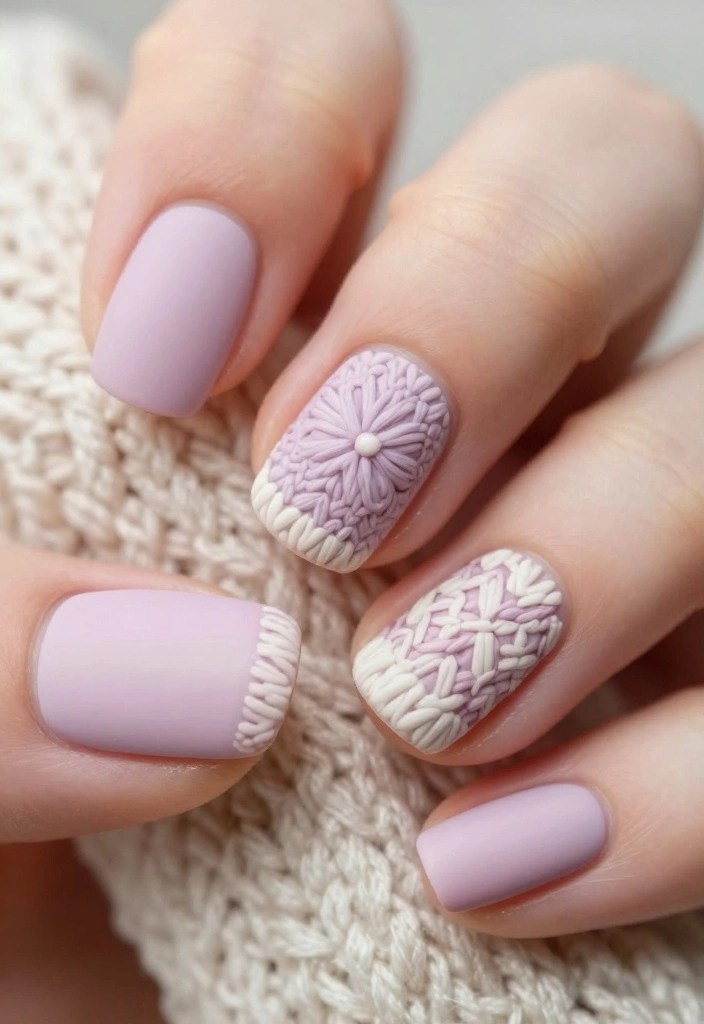
Embrace the warmth of your favorite cozy sweater with delightful sweater patterns on your nails! This fun design is perfect for the winter season and adds a touch of comfort to your style. Select a soft pastel base like pink, mint, or lavender for that inviting feel.
Once your base is completely dry, use a nail art brush to create knit-like patterns. Think of intertwining lines that resemble the stitches of your favorite sweater. You can even finish with a matte topcoat for that lovely fuzzy finish!
Here’s how to create your cozy sweater nails:
– Choose a pastel base color
– Use a contrasting polish for pattern details
– Create knitted designs with a nail art brush
– Add a heart or snowflake for charm
– Finish with a matte topcoat for texture
This design is not only adorable but also evokes that warm, cozy feeling of winter.
Did you know 8 out of 10 winter nail looks start with a soft pastel base? When you pair knit patterns with pink, mint, or lavender, DIY winter nails instantly feel cozy and chic.
Cozy Sweater Patterns
Editor’s Choice


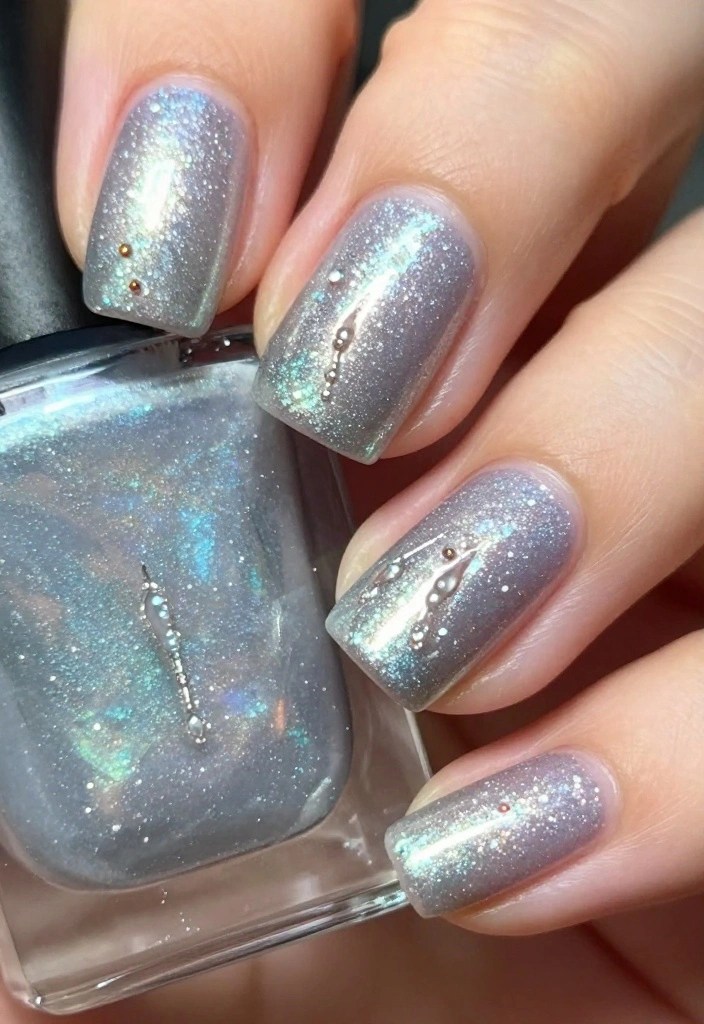
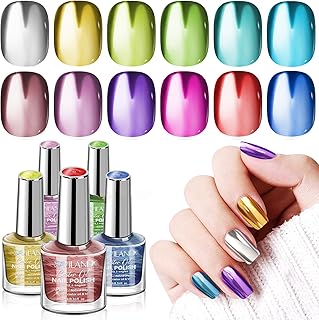
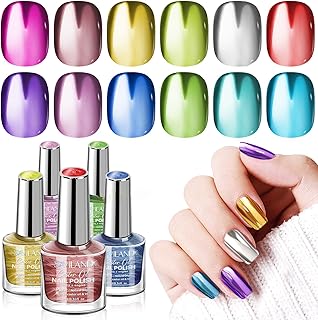
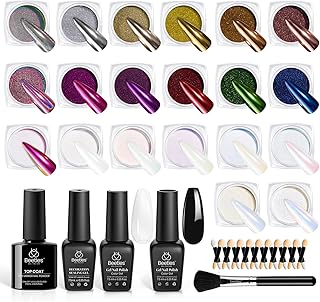
5. Metallic Winter Wonderland
Shine bright this winter with a stunning metallic winter wonderland theme! Metallic colors like gold, silver, or rose gold create a bold and glamorous effect on your nails. You can choose to paint all your nails in one color or mix different metallics for a dazzling look.
To add a unique touch, use a sponge to create starry night designs or constellations. A glossy topcoat will enhance the shine and keep your nails looking fabulous!
To get started, follow these steps:
– Apply a base coat and let dry
– Paint your nails with metallic polish
– Use a sponge for texture and depth
– Seal with a glossy topcoat for enhanced shine
This design is perfect for those who want to add a little sparkle to their winter nail game!
DIY winter nails feel magical when you mix metallics—gold with silver creates a starry, showroom-ready look. Use a sponge to add tiny constellations, then finish with a glossy topcoat for enduring shine.
Metallic Winter Wonderland
Editor’s Choice


PRONAIL – Nail Polish Top Coat 16 Oz – Professional Strength, Long Lasti…
📹 Related Video: ❄️Sparkling Winter Nail Art Designs✨| Best Christmas Nail Art Tutorial
@media (max-width: 768px) { .internal-links-flex { flex-direction: column !important; } .internal-links-flex > div { flex: none !important; } }
You might also like

10 Best Valentine’s Day Nail Art Kits of 2025 – Create Stunning Designs at Home
6. Festive Red and Green
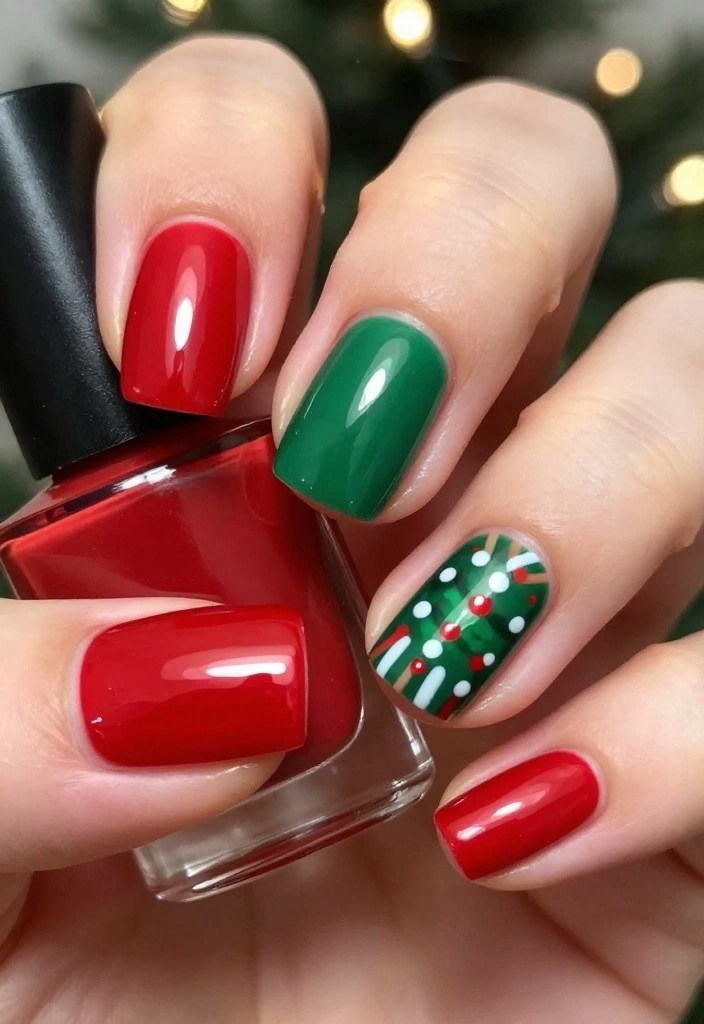
Embrace the holiday spirit with cheerful festive red and green nails! This playful design is perfect for winter celebrations and brings joy to your fingertips. Start by applying a base coat, then alternate painting your nails red and green for a vibrant look.
For added fun, use a toothpick or fine brush to create stripes, polka dots, or Christmas tree designs. Don’t forget to finish everything with a topcoat for a long-lasting shine! Incorporating glitter can also add that extra holiday sparkle.
Here’s how to achieve this festive look:
– Apply a base coat and let it dry
– Paint nails in alternating red and green
– Create fun designs on accent nails
– Seal with a glossy topcoat
This design is all about fun and creativity, perfect for the joyous winter season!
@media (max-width: 600px) {
.normal-quiz-iframe { min-height: 570px !important; height: 570px !important; }
}
7. Elegant Marble Effect
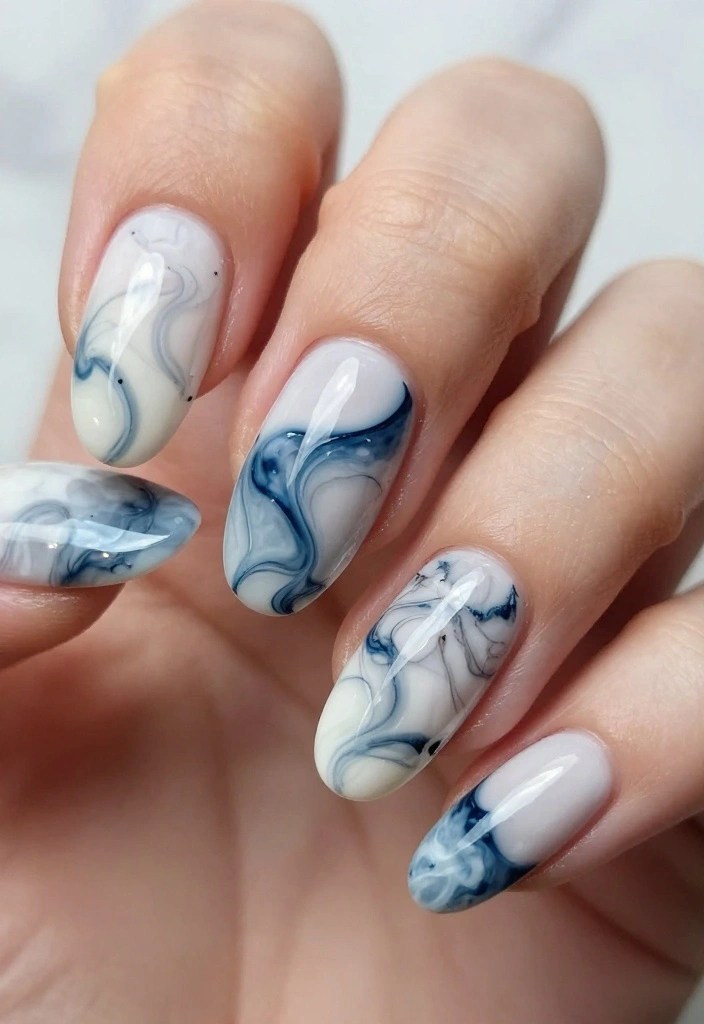
Add a touch of elegance to your winter nails with a sophisticated marble effect! This design is not only chic but also incredibly easy to achieve. Start with a smooth base coat of white or pale grey for that classy background.
To create the marble look, drop a few dots of black or dark blue polish onto the wet base and swirl them gently using a toothpick. A light touch is key for a beautiful finish. Top it off with a shiny topcoat to protect your design from chips.
Steps for creating your marble effect nails:
– Apply a base coat and let dry
– Use white or pale grey as the base
– Swirl dark polish onto the wet base
– Finish with a glossy topcoat for durability
This elegant design will have you feeling sophisticated all winter long.
8. Icy Gradient with Rhinestones
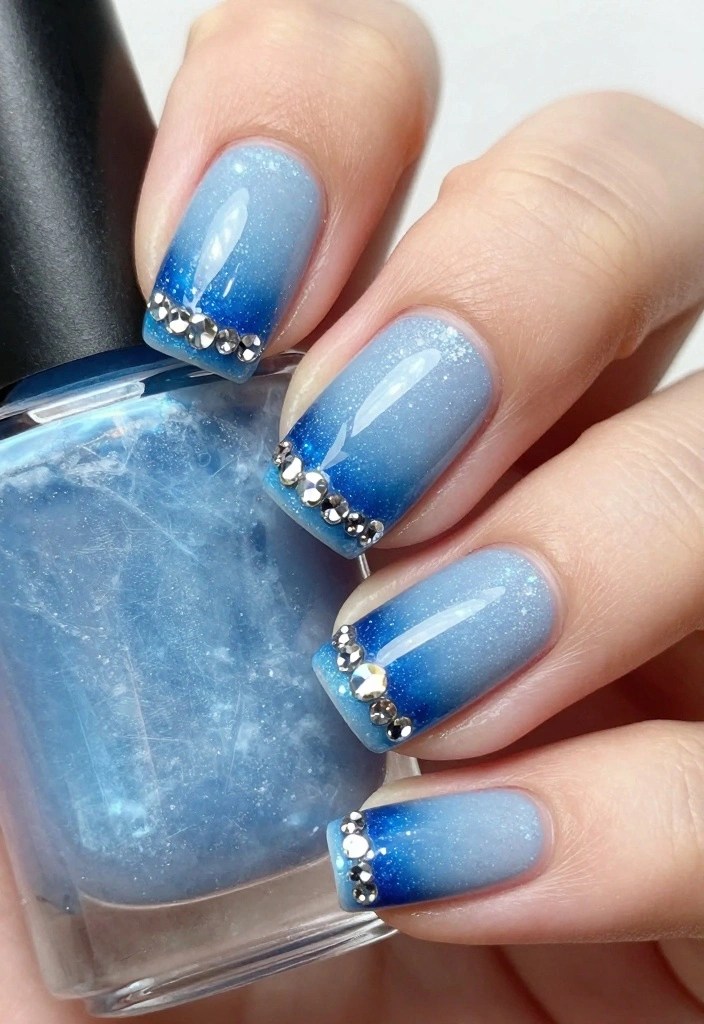
Elevate your winter nails with a stunning icy gradient design, enhanced by sparkling rhinestones! This eye-catching look is perfect for adding a bit of glam to your winter style. Start with a base of icy blue and blend into a lighter shade towards the tips using a makeup sponge.
Once your gradient is dry, carefully place small rhinestones at the base of each nail or sporadically across your accent nails for a touch of sparkle. Finish with a topcoat to protect your design and keep it looking fabulous!
Here’s how to create this gorgeous look:
– Apply a base coat and let dry
– Blend icy blue into a lighter shade
– Use a sponge for a smooth gradient
– Add rhinestones for glam
– Seal everything with a topcoat
This design is not only beautiful but also a fun way to express your winter spirit!
9. Cute Penguin Nail Art
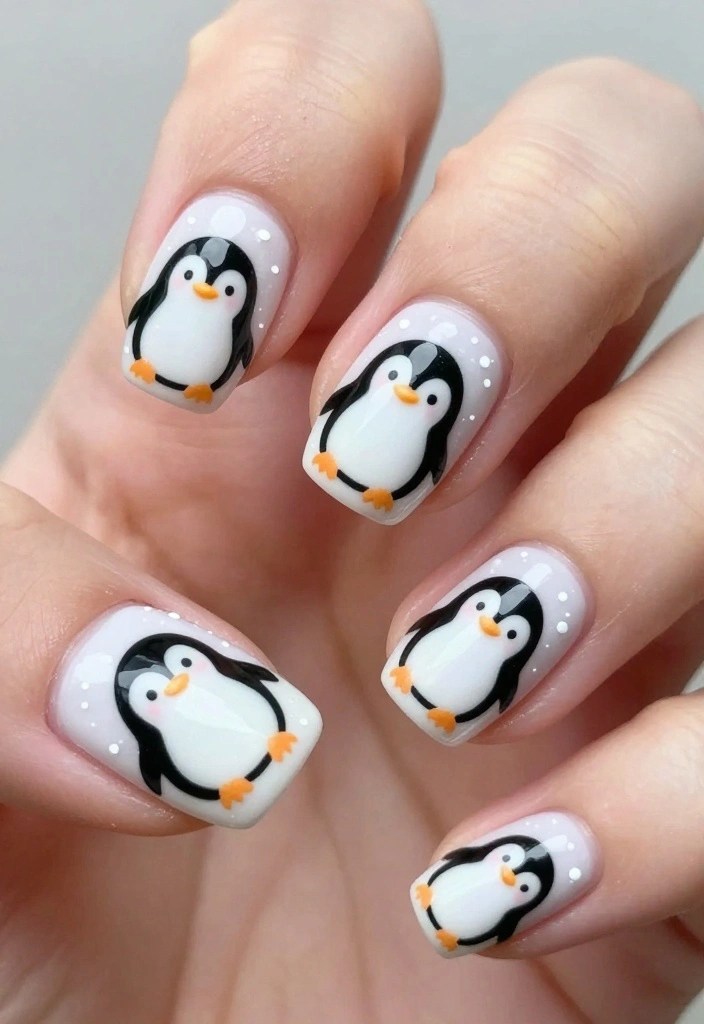
Bring a playful touch to your winter nails with adorable penguin nail art! This cute design is perfect for winter and will surely bring a smile to anyone who sees it. Begin with a white base coat and let it dry completely, setting the stage for your penguin masterpiece.
Use black polish for the penguin’s body and orange for its feet and beak. A dotting tool will help you create perfect circles for the eyes. For an extra touch of whimsy, use a sponge to create a snowy background for your penguin.
Here’s how to make your cute penguin nails:
– Apply a base coat and let dry
– Paint nails white for the background
– Create penguin shapes with black and orange polish
– Use a sponge for snowy effects
– Seal everything in with a glossy topcoat
This design is fun, cheerful, and perfect for the winter season!
DIY winter nails shine with playful penguins—practice the white base, black bodies, and orange beaks until you nail the symmetry. A tiny dot for eyes and a snowy sponge backdrop make the design feel magical and ready to show off.
How To Create DIY Winter Nails That Impress
Tools You’ll Need:
– Nail polish (various colors)
– Base coat and top coat
– Nail art brushes or dotting tools
– Nail tape (optional)
– Rhinestones or glitter (optional)
– Cotton pads and nail polish remover
Step 1: Prepare Your Nails
Before diving into any DIY nail art, start with clean, dry nails. Remove any old polish and push back your cuticles gently. 🧼 Consider using a nail file to shape your nails into your desired style, whether it’s square or round.
✔ Buff the surface of your nails lightly to help the polish adhere better.
✔ Apply a base coat to protect your nails and ensure even application of the polish.
Step 2: Choose Your Winter Theme
Decide on a winter theme that excites you! Winter nail art can include icy designs, cozy patterns, or festive motifs. Think of colors like frosty blue, snowy white, and sparkling silver. ✨
✔ Consider what reflects your style or mood—simple snowflakes for a classic look or bold metallics for a statement.
Step 3: Apply the Base Color
Once your nails are prepped, it’s time to paint! Start with your base color that matches your theme.
✔ Use a light blue for an icy feel or a deep red for a festive vibe.
✔ Apply two coats for a vibrant finish. Let each coat dry completely before moving on.
Step 4: Adding Designs
This is where your creativity shines! You can use nail art brushes or dotting tools to create fun winter designs.
1. Frosty Blue Ombre: Using a makeup sponge, dab two shades of blue onto your nails for a beautiful gradient effect.
2. Snowflake Accents: Use white polish to draw delicate snowflakes. A dotting tool can help create the intricate designs.
3. Glittery Icicles: Apply a thin line of glitter polish at the tips of your nails to mimic icicles hanging from eaves.
4. Cozy Sweater Patterns: Use a thin brush to create cable-knit patterns in soft colors for a cozy touch.
5. Metallic Winter Wonderland: Play with metallic colors to create a chic winter design. Swirl them together for a marbled effect.
6. Festive Red and Green: Combine red and green for a classic Christmas look, using one color as the base and adding dots or stripes in the other.
7. Elegant Marble Effect: Swirl together a couple of colors in a water bath for a stunning marbled nail effect.
Step 5: Finishing Touches
After you have completed your designs, allow everything to dry thoroughly. Finish with a top coat to seal in your art and add shine.
✔ This step is crucial as it protects your designs from chipping and gives a professional finish.
✔ If you used any embellishments like rhinestones, apply a drop of clear polish to secure them in place.
Step 6: Cleanup and Care
Once everything is dry, clean up any polish that may have gotten onto your skin or cuticles. Use a small brush dipped in nail polish remover to tidy up edges.
✔ Keep your nails looking fresh by moisturizing your hands and cuticles.
Pro Tip: Don’t rush the drying process! Allowing each layer to dry completely will ensure your designs last longer without smudging.
With these steps, you’ll create stunning DIY winter nails that are sure to impress. Experimenting with different designs and colors will keep your nails looking chic throughout the season. Happy nail painting! 💅
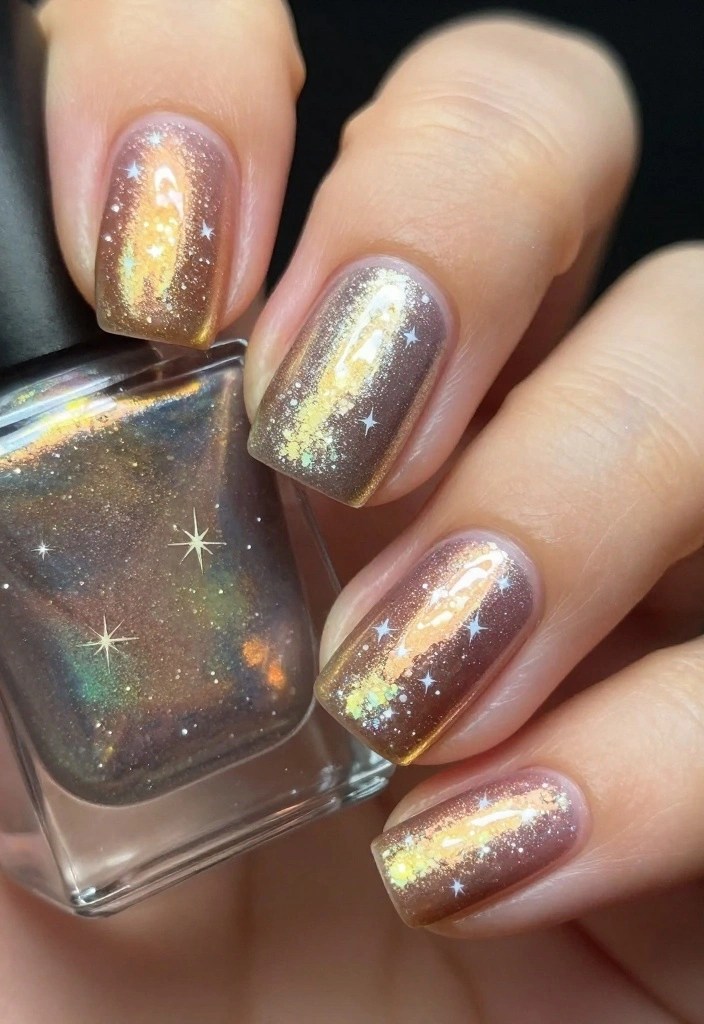
10. Winter Galaxy Nails
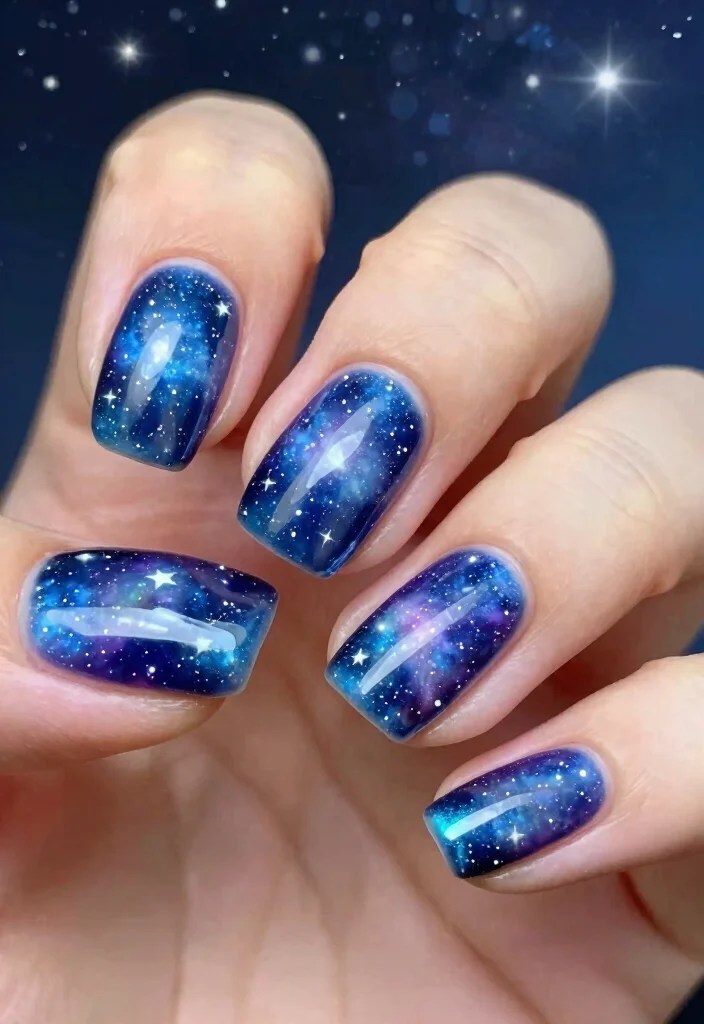
Finish off your DIY winter nail journey with mesmerizing galaxy nails! This cosmic design is perfect for those cold nights spent stargazing. Start with a black or dark blue base coat to set the stage for your galaxy.
Once dry, use a sponge to dab on shades of purple, blue, and silver, blending them into your base for an ethereal effect. Use a small brush to create stars with white polish, and sprinkle fine glitter for that extra sparkle!
Here’s how to achieve this dreamy look:
– Apply a base coat and let dry
– Paint nails black or dark blue
– Use a sponge to apply purple and blue
– Create stars with white polish
– Finish with glitter and seal with a topcoat
This design will leave your nails looking stunning and filled with winter magic!
Winter Galaxy Nails
Editor’s Choice


Conclusion
With these DIY winter nail ideas, you can embrace the chilly season with creative flair!
Whether you choose frosty ombres, playful penguins, or sparkling galaxies, your nails will not only reflect the beauty of winter but also your personal style. Experiment with different designs and colors to make them uniquely yours, and don’t shy away from mixing techniques! Happy nail painting, and may your winter be as wonderful as your nails!
Note: We aim to provide accurate product links, but some may occasionally expire or become unavailable. If this happens, please search directly on Amazon for the product or a suitable alternative.
This post contains Amazon affiliate links, meaning we may earn a small commission if you purchase through our links, at no extra cost to you.
Frequently Asked Questions
What supplies do I need to start DIY winter nails?
Starting DIY winter nails is easier than you think! Here’s your essential starter kit: base coat, top coat, at least a couple of winter-appropriate nail polish colors (think navy, burgundy, white, metallics), a good clear top coat for extra protection, and a reliable remover. You’ll also want tools: a buffer and nail file, cuticle pusher, and an orange stick. For nail art fun, grab a dotting tool, a few striping tapes, a small brush, and a makeup sponge for gradients. Don’t forget a bottle of quick-dry drops to speed things up. Consider starting with a DIY starter kit to keep things neat and affordable. With these, you’re ready to begin your step-by-step journey to DIY winter nails.
What are easy winter nail art designs for beginners doing it yourself?
Here are easy winter nail art designs for beginners doing it yourself:
1) Snowflake accent on a solid base: paint a deep blue or burgundy base, then add a white snowflake with a fine brush and seal with top coat.
2) Classic plaid: map lines with striping tape, apply two contrasting colors, and carefully remove tape while the polish is tacky for clean lines.
3) Frosty gradient: dab two colors on a makeup sponge and dab from the tip toward the center to create a frosted fade, then sprinkle with fine glitter.
4) Glittery tips: paint the tips with a glitter polish or apply glitter along the free edge for a chic look. Remember to apply a base coat and seal with top coat.
How can I make my DIY winter nails last longer and prevent chipping?
To make DIY winter nails last longer: start with clean, dry nails and use a proper base coat to protect and smooth the surface; apply thin coats of colored polish, letting each coat dry fully, and finish with a top coat. Reapply the top coat every 2–3 days to maintain shine and prevent chips. Wear gloves for cleaning chores and avoid prolonged water exposure for the first 24 hours. Consider a nail strengthener or cuticle oil between manicures to support healthy nails. If you choose gel, cure under an LED lamp as directed and follow safe removal guidelines.
How do I fix common mistakes in DIY winter nails without ruining the design?
Mistakes and fixes for DIY winter nails: 1) Smudges on the wet paint? Apply a quick-dry top coat over the area to seal it, or carefully brush a thin layer of polish over the smudge once dry. 2) Uneven edges? Dip a small brush in acetone and tidy the edges, then re-seal with top coat. 3) Chipped tips? Add a fresh thin layer of color or top coat to blend in, then finish with a final coat. 4) Wobbly lines? Use striping tape to outline smooth lines, then fill in with light strokes. Practice makes perfect in this do it yourself journey.
Can I achieve impressive DIY winter nails with regular polish, or do I need gel?
Can I achieve impressive DIY winter nails with regular polish, or do I need gel? Regular polish is perfect for beginners and easier to remove, while gel offers longer wear and a shinier finish but requires an LED lamp and careful removal. If you’re just starting, stick with regular polish and a strong top coat for durability. If you want extra longevity, try gel-like top coats or gel overlays designed for home use. Choose 5-free or 8-free polishes to minimize harsh chemicals and always work in a well-ventilated area.
Related Topics
DIY winter nails
nail art
winter designs
beginner friendly
easy techniques
festive nail art
do it yourself
nail trends
seasonal nail art
colorful patterns
quick tips
holiday nails

Leave a comment